If you’re looking to build a raised bed garden, this blog post is your one-stop shop. We will go over common questions urban farmers have, as well as lesser known tips and tricks, so you can get a solid yield out of your raised bed.
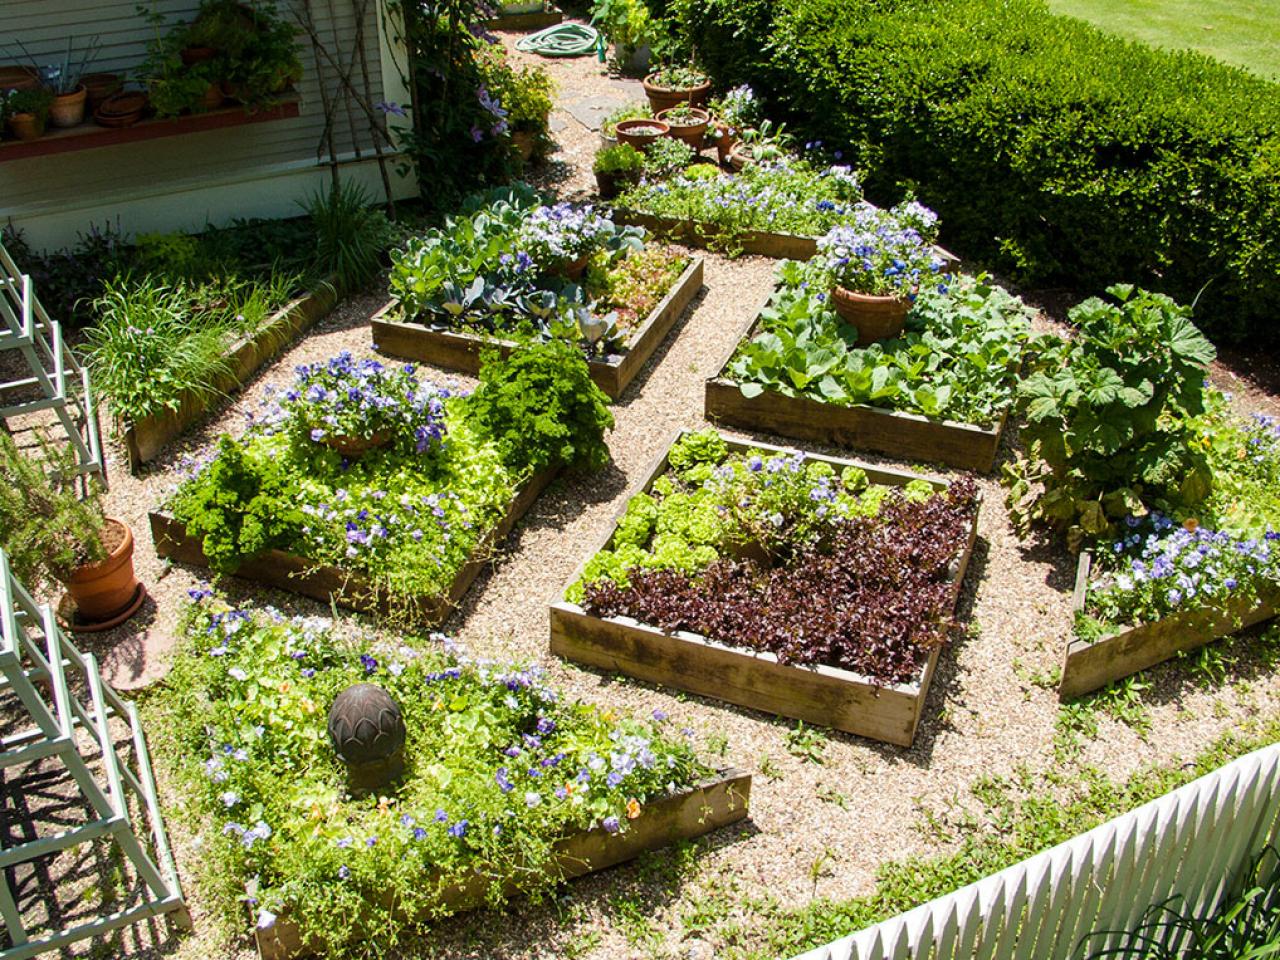
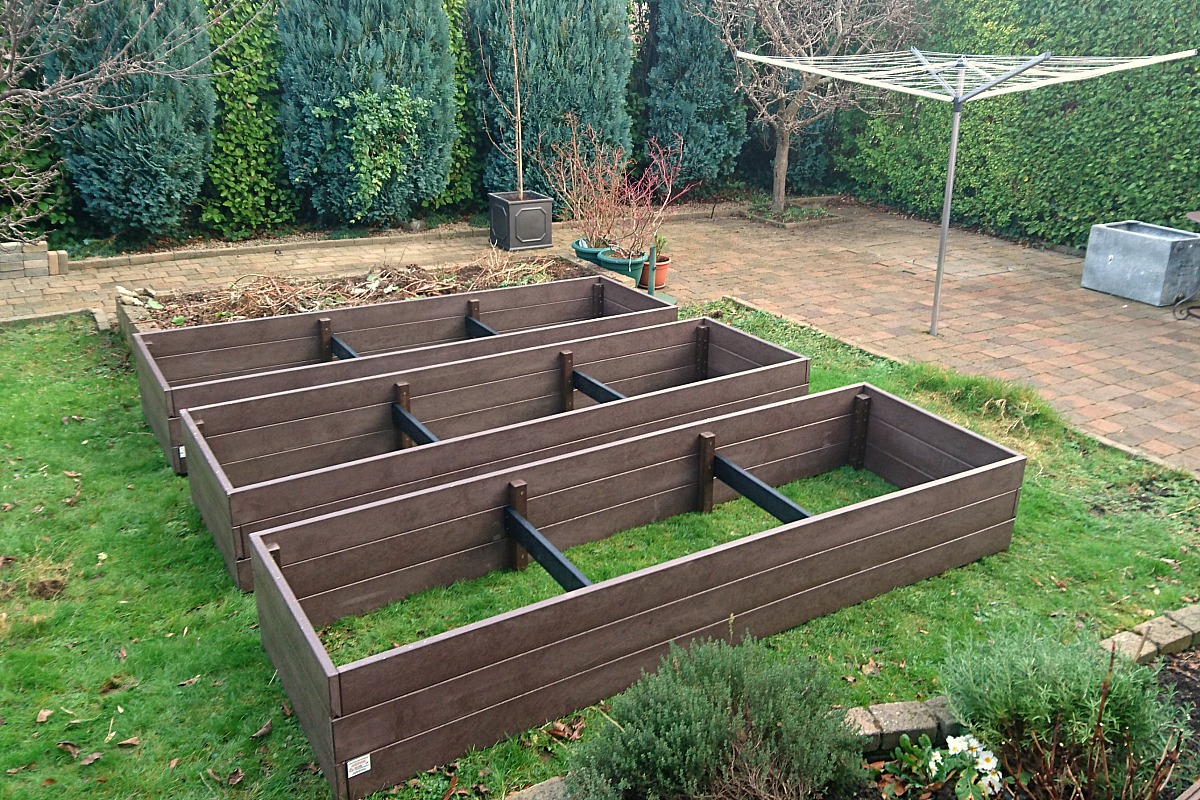
The featured image is a raised bed I built that lasted the entire whole winter in Toronto. If you want to build something similar, I’ll show you exactly how I did it. I must warn the reader that the raised bed isn’t for everyone. Check out the pros and cons list below to see if it is the right choice for your farming needs.
👍🏻 Benefits of raised beds
- Helps with bad soil. With a raised bed, you will contain all your plants in the soil that you put in to the raised bed. If you are growing on concrete, on a roof, or in soil not be suitable for growing, raised beds make a great option for you.
- Ergonomic. Raised beds make it easier to access your plants because it elevates them from the ground. This can eliminate the need to bend over and also provide an edge for you to sit on.
- Easier to weed and maintain. You will be able to weed your bed with ease since the soil is not compressed. Also, if you put a top layer of straw, it will be hard for weeds to reach the soil, thereby making them easy to pull out.
- Heats up faster in the spring. With the sides exposed to the elements, the lower part of your soil will defrost sooner in the spring.
- Drains better. Raised beds have looser soil and tend to drain better, so roots won’t soak with heavy watering.
- Extends the length of grow time. With a simple hoop frame over your raised bed, you can protect your plants from frost and extend your growing season on both ends.
- Looks great. They add a nice defined space for growing food and keep everything neat, tidy, and contained.
👎🏻 Drawbacks of raised beds
- Costly. As you may have already guessed, it costs money to raise up your growing area. From the expense of products to raise the bed to the outsourced labour, if you don’t wish to do it yourself.
- High commitment. Having a raised bed is also a long-term endeavour, and if you don’t own the land it sits on, the investment might not be worth it.
- Requires more water. Raised beds allow water to drain faster, so if your area does not get much rainfall, it will take more watering to grow your crops.
- Hard to work with machines. Of course, this really has to do with the size of your raised bed. But if you want to get tools into your raised bed, it can be a challenge when the bed is on the smaller size.
- Loses ground heat. Growing through the winter, you will lose out of the heat retained in the ground. So if you want your crops to last over the winter, this could be a problem in your raised bed.

📐 What’s the right size for a raised bed?
There is not one right answer for the dimensions of a raised bed, however, here are some things to consider when creating your blueprint:
- The higher the raised bed, the more expensive and the more resources you will need.
- You want to be able to reach all areas of the bed: the standard is around 2′ from one side. If you have access to both sides, you can make it up to 4′ wide.
- Make your bed low and wide for leafy green crops and high and narrow for larger fruiting crops.
- Higher raised beds are easier to work with because you will not need to bend over as much to harvest and work on your garden.
- Higher raised beds also increase what you can grow out of them. If you bring it up above 3′ you can grow almost anything.
- The higher you build your raised bed, the stronger it will need to be. Soil is heavy and when water is added it will really put weight on your wall.
🚫 What to avoid with raised beds
- Not making it wide enough for you to reach your crops. A comfortable distance is around 2′ to from the edge.
- Improper irrigation. After spending a great amount of time with setting up your raised bed, it’s important to make sure you are watering your plants accordingly. Best are the ones that water under the soil to prevent evaporation and to keep the top of the soil dry. If you are doing automatic watering, I use it that for base level watering and control the rest personally.
- Not using food safe material. Old pressure-treated wood is the most common material, but do not to use for your raised bed. Even thought chromated copper arsenate was phased out in 2003 — and a copper base is now used —studies show it can be safe to grow food. However, I would still avoid it for most root veggies and leafy greens. I’d also advise against using old tires, as it has collected a lot of detritus from the road. It also contains harmful chemicals that leach into the soil and into the food that you will eat.
- Not adding proper nutrient-rich soil. The point of the raised bed is to add amazing soil for you crops to grow in. Just adding any type of soil will defeat this purpose.
- Not enough space between your beds. You want to make sure you have enough space to walk through and bring tools and wheelbarrows.
Building your raised bed
There really isn’t one right way to build a raised bed. Just remember that the main goal is to build a structure that supports soil, water, and food growth. Common material for building your walls up are old logs, spruce wood, cedar boards, stone or concrete blocks, and even something as rudimentary as a large mound of soil, constructed in the Hügelkultur style.
If you want a step-by-step construction guide, check out my previous FMC project review, in which I detail the complete build process for a front yard raised bed.
🪴 Filling your raised bed
How you fill your raised bed with soil will largely be determined by how tall it is. There are also many schools of thought around this: ideally, simply adding nutrient dense soil is the way to go. Here are things to consider when filling your raised bed:
- Know what you are growing. Make sure you have determined what exactly you want to grow first, as some crops require different types of soil mix.
- Fill the bottom with newspaper or cardboard. This base will break down and also attract worms to come into your raised bed.
- Add leaves and hay. This will also break down over time.
- Use shredded straw as cover. Run a lawn mower through straw and use it on the top of your bed as a cover.
- Nourish with compost tea. Adding a DIY compost tea watered will provide nutrients throughout the raised bed. Here’s an easy recipe for compost tea.
🪴 Hügelkultur style
The diagram above is the standard way to fill a bed, but if you have a deep raised bed, you would want to try the Hügelkultur method. This is done by placing large logs and organic matter in the bottom of your raised bed. If you opt for this style, here are some things to consider.
- Logs and large organic matter in the bottom will break down over time, hold moisture, and release nutrients into the soil. It will also generate heat in the process.
- Make sure to add a lot of nitrogen-rich debris around the base as the large stumps will absorb a lot of nitrogen in the first year or two. This means leaves, grass clippings, coffee grinds, etc.
- Adding fungi is essential to make sure the decomposition is successful.

🍄 Things to add to your soil
- Perlite. This is product is great as it holds moisture & keeps soil from clumping together.
- Warms and castings. If your bed is built on soil, and you add things that will attract warms this will be done naturally, but you can also dig a hole and add your own warms to the soil.
- Fungi. Considered the internet for the soil. This really adds a layer of connectedness to your garden and also assists in the breaking down of mater
- Essential and trace minerals. Often found in rock dust products, but our soil is depleted of many of the basic building blocks of life.
Watering your raised bed
Having gone through all the trouble of building a raised bed, it is paramount to carefully plan the irrigation system that you will use. Here are some things to consider:
- You are able to water each bed differently, as some crops will require various amounts of soil and have different levels of exposure to the sun.
- If you opt for automatic watering, set it to the minimal amount, so the plants won’t die from drought but will also be water logged.
💧 Soaker hose
- Found in almost all hardware stores or online.
- Can weave around your plants in an even arrangement.
- Great to hide it under your top mulch to protect the hose from sun exposure.
💧 Drip irrigation system
- It does take a little longer to set up and the cost of small parts can accumulate.
- You can customize the system to add more water or less to certain plants or areas.
- Keep the pipe out of direct sunlight to retain the longevity of the irrigation system.
💧 Sub-irrigated raised bed
- Sub-irrigated planters (SIP) are amazing for those who don’t have time to water.
- There is always water at the bottom of your raised bed, so when the roots reach the bottom they will have lots to drink.
- The beds are not for young plants, and you will need to top water until they are well established.
- Important to have a water overflow hole if it often rains where you are — you want to make sure you don’t over water your raised bed.
- The overflow hole can be more effective with automatic watering, as you can’t ever water too much. Still, it’s important that you are checking it if you go the automatic watering route.
Updated August 24, 2021. Originally published March 1, 2020.

